
The above paragraph is formatted as a "hanging indent". Hanging indents are sometimes also called "outdents".
By default, hanging indents are used automatically by Atlantis when you format paragraphs as bulleted, numbered or outline items.
But you might need to create hanging indents manually yourself in Atlantis. This is generally required in most standard writing styles for bibliography notes. The author's name juts out to the left, while the rest of the paragraph is indented inwards:

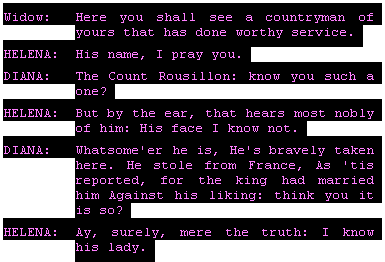
Hanging indents are also often used to format dialogs in theatrical plays:
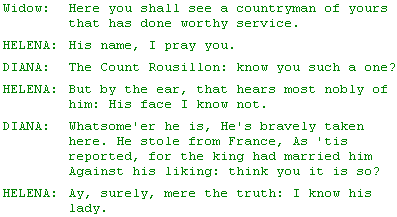
Now here is how to create such hanging indents in Atlantis.
Let's suppose that you have the following bibliography note:

To conform to official writing standards, you need to "outdent" the first line of this paragraph.
1. Place the insertion cursor within the paragraph.
2. Press Ctrl+T. The second and subsequent lines (if any) will start moving to the right. Press Ctrl+T repeatedly as many times as necessary to create the proper "outdent". Press Ctrl+Shift+T if you've gone too far and want to go back. In this particular case, pressing Ctrl+T once will probably be enough.
You should get this:

Now let's pretend that you have jotted down the following drama script:
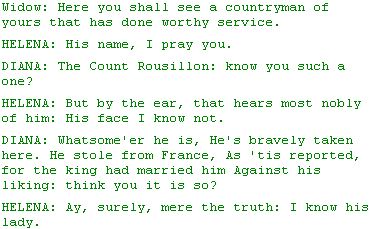
The above script would look better and be easier to read if each paragraph was formatted with hanging indent.
The first thing to do if you haven't already done so is to insert a tab mark where you want the lines to start aligning vertically, i.e. after each character name "heading". Tab characters are inserted with a press of the Tab key. They display as right arrows under the "View | Special Symbols" mode of Atlantis:
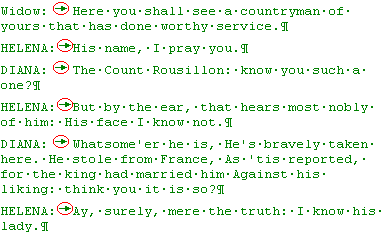
Then select all paragraphs, and press Ctrl+T. The second and subsequent lines of the selected paragraphs will start moving to the right:
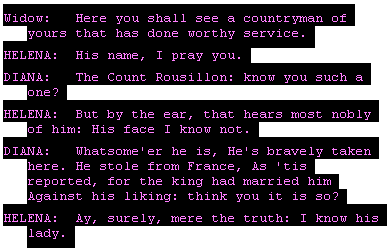
Press Ctrl+T repeatedly as many times as necessary to achieve the desired indenting. You should get something like this:

If you have created too much overhang, press Ctrl+Shift+T. This will move the lines back.
If you prefer Justified alignment for your paragraphs, you can apply it to the same selection with Ctrl+J and get this:
Here is another use of hanging indents. At times, you might want to create a hanging indent for a manual list of items.
First, type your list in the following way: insert a Tab character after the list title (press the Tab key); and use Shift+Enter to insert line breaks after each list item but last. Line breaks display as small "crooked" left arrows when you enable the "View | Special Symbols" mode of Atlantis:

Leave the insertion cursor where it is (i.e. within the paragraph which you want to format as a "hanging indent"), and press Ctrl+T repeatedly until the second and subsequent lines align vertically in the desired way, like this:

Surely you can now see the beauty and ease of using hanging indents.
1 comment:
Yes, it's definitely beautiful :-)
Post a Comment