Now what if you do not want to wait until the current page gets filled up? What if you want to start afresh on a new page at once? The solution that comes to mind straightaway to most people is: "I only need to press Ctrl+Enter". That's right: Ctrl+Enter inserts a so-called manual page break symbol (or simply page break) into documents at the current location. When the "View | Special Symbols" mode is enabled, a page break symbol looks in this way:

Whenever Atlantis encounters this symbol within the flow of a document text, it creates a new page in the document, and carries all further text over to that new page.
To many, this is the most obvious method to forcefully create new pages in a document. But in spite of its simplicity, this method should be avoided whenever possible, especially by inexperienced users.
This is because the page break symbol in reality belongs to the paragraph carried forward to the next page. The page break symbol and the paragraph body that follows on the next page are actually one single paragraph ending with a common "paragraph end mark" (the so-called "pilcrow" symbol). When you insert a page break into a document, you create a new paragraph which is automatically broken into two parts:
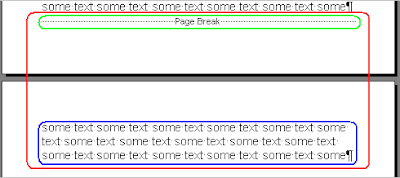
The beginning of the paragraph (highlighted in green above) is essentially the page break symbol itself and remains on the page it was inserted into. The rest of the paragraph (highlighted in blue above) is carried over to the next page even though it comes right after the page break symbol. In the above picture, the whole of the paragraph straddling two pages is marked with a red border.
So a "Page Break" symbol not only signals the end of the page it sits on, but it is also part and parcel of the paragraph carried forward to the next page.
When the "View | Special Symbols" mode is on, the paragraph end marks terminating all paragraphs are easily seen:
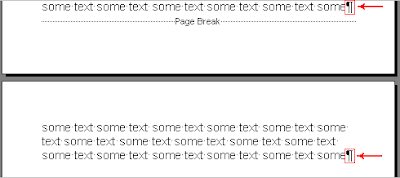
But when this same "View | Special Symbols" mode is off, the paragraph end marks are not showing. It is then often very difficult to detect that a paragraph beginning with a "Page Break" symbol actually straddles two pages:
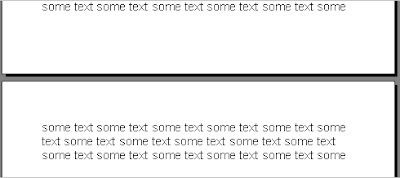
This is why paragraphs containing "Page Break" symbols are often a source of problems in documents.
Let's take up the same example.
If we place the cursor right before the first character of our "Page Break paragraph" on page #2:
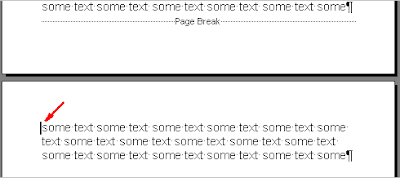
and apply the "Heading 1" style to this paragraph, it might look as if only the second part of the paragraph was affected by this change:
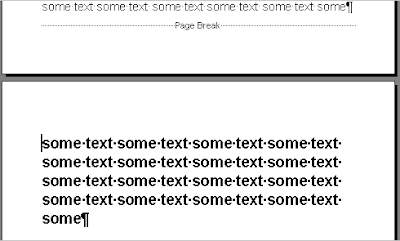
This is simply because the change in the formatting applied to the "Page Break" symbol does not show: as a symbol, its display is unchangeable. But even then, any paragraph formatting applied to a "Page Break paragraph" will affect both parts of it on either side of the interpage divide.
So the "Heading 1" style was actually applied to the part of our paragraph on page #2, but also to the part remaining on page #1. This is easily demonstrated if we click at the end of page #1 right before the "Page Break" symbol, then type new text. It will automatically be formatted with a larger font size and bold attribute, i.e. with the formatting associated with the corresponding paragraph, that of the "Heading 1" style:
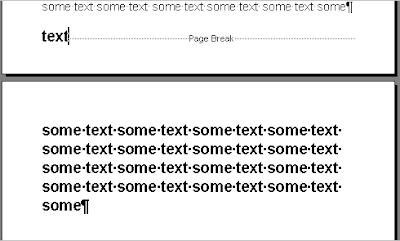
So "Page Break symbol paragraphs" can be a source of various formatting problems.
But this is not all. When they are referenced in a table of contents, both parts of these "Page Break symbol paragraphs" automatically get included in the corresponding table items. Sometimes with unexpected and undesirable results.
These are only a few examples of the many problems that can be created by "Page Break symbol paragraphs". This is why it is preferable to avoid inserting these "Page Break" symbols in documents.
Now you might ask "how do I create page breaks safely then?"
Here is how:
1) Click within the paragraph to be placed on the new page after the page break.
2) Run the "Format | Paragraph..." menu command, or press the associated hot key Ctrl+Shift+G.
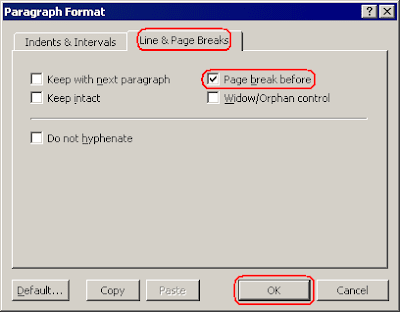
3) In the "Paragraph Format" dialog, click to show the "Line & Page Breaks" tab, check the "Page break before" box, and OK out of the dialog:
The target paragraph will automatically be carried forward to the top of a new page. If the "View | Special Symbols" mode is on, you will notice a special mark on the left of the first line of that paragraph:
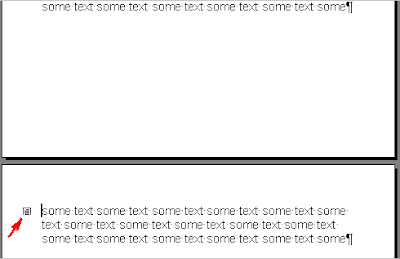
This kind of mark indicates that the corresponding paragraph will always be placed at the top of the page it is located in.
Note that toggling the "Page break before" attribute for a paragraph can also be done with the corresponding toolbar button:
This button is present by default on the Alternative set of toolbar commands of Atlantis.
A hot key can also be associated with the "Page break before" command through the "Tools | Hot Keys..." dialog:
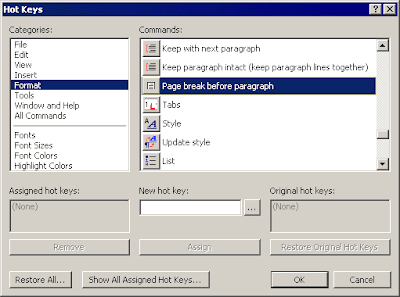
Assigning a hot key to the "Page break before" attribute will allow you to toggle it for the current paragraph with a single key press.
As you probably know, the "Heading 1" style is traditionally applied to the paragraphs heading all new chapters. Also each new chapter usually starts on a new page. So it would be nice if applying the "Heading 1" style to a paragraph automatically placed that paragraph at the top of a new page, making it the heading of the new chapter. This is done by associating the "Page break before" attribute with the "Heading 1" style. Here is how to:
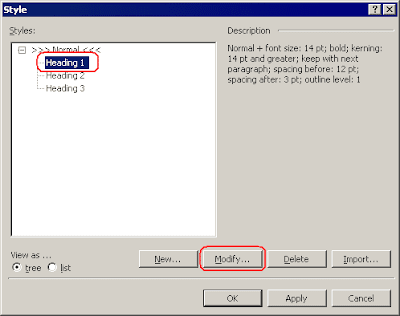
1) Run the "Format | Style..." menu command.
2) Select the "Heading 1" style, then press the "Modify..." button:
3) Click the "Paragraph..." button in the "Edit Style" dialog:
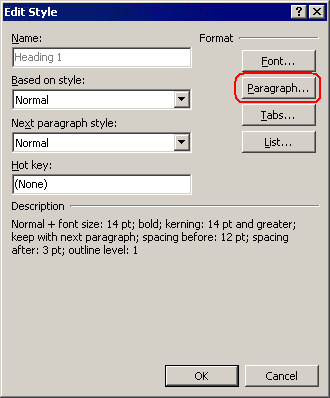
4) On the "Line & Page Breaks" tab of the "Paragraph Format" dialog, check the "Page break before" box, and OK out of all open dialogs.
Any paragraph associated with the "Heading 1" style will then automatically be formatted as set, and placed at the top of a new page.
No comments:
Post a Comment